


In creating their miniature worlds, certain model railroaders strive for the most realistic representation of the big world as possible. For others, the idea of distressing an expensive model gives them night terrors. Between these extremes is a broad spectrum of tastes. In all cases, refer back to Rule No. 1: It’s My Railroad. You decide on the approach that makes you comfortable or give you the most satisfaction.
In my case, I have what might be called a medium-sized pike. (You know, I have never liked that word; makes me sound like John Allen or something. Let’s switch to “railroad”.) My railroad hosts multiple eras, which means that I own a LOT more rolling stock than is strictly necessary for any given day. This, of course, has implications for the budget. As a result, I buy a lot of inexpensive, shake-the-box kits whenever possible. Now, anyone who’s looked very carefully at this class of car realizes that they can lack a lot of realism; the detail can be chunky, the paint jobs marginal, and all this is emphasized if you just assemble one and drop it on the rails as-is.
Fortunately, there’s an easy way to enhance the plastic parade of cheapness without bleeding cash, and that’s to weather it. Cheaply. Quickly. And best of all, non-destructively. How? With craft-store acrylic paints. You might be amazed how a quick weathering job totally transforms an inexpensive car (or an expensive one!) into a convincing representation of real equipment, and how that makes the crude detail just kinda fade… away…
The nice thing about using these acrylics is that they are non-permanent. You can work with them after application simply by wetting a brush in water; you can remove them easily, even after they are dry; you can spray them or apply as a wash; they are non-toxic; they’re pretty disaster-proof as well.
There are a lot of weathering techniques out there, and I’ve used a number of them. You can even combine them to achieve a particular effect. But for today’s purpose I am talking about doing a batch, quickly.
Here’s what you need:
• an airbrush (I found one on the ‘net for about $85, including the compressor)
• a few basic acrylic paints: black, brown, ochre, light tan, white.
• a plastic paint palette, preferably one of the round kind with several built-in dishes for mixing.
• a fairly small paint brush or two
• some alcohol– 73% isopropyl if you can even find it in this COVID world. I use some surplus methanol for this, though I might not recommend it to everyone. We’re using it to spray with.

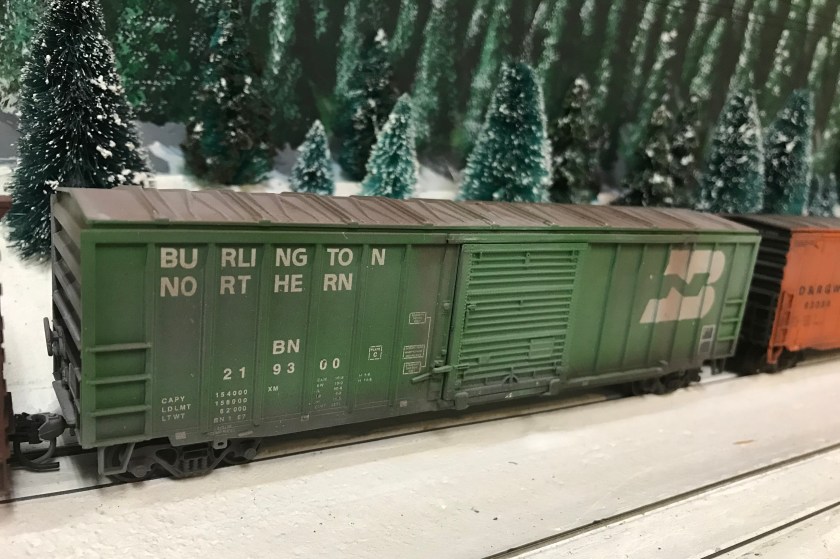
But first! Before you pop open the paint, do a little visual research first. See what the real thing looks like. There are a few factors that come into play that help us decide on our approach. First is your era. Ask yourself, in my era, how old is this car? If it’s fresh from the manufacturer, the amount of oxidation and grime will be less; a 50-year-old covered hopper might not be as pristine. Also, consider graffiti. Surprisingly, prior to the year 2000 it was not very common, whereas these days it’s unusual to find a non-tagged car. Another factor is the car’s typical operating environment. You’ll see that, say, a D&RGW boxcar will pick up a lot more black soot than a granger road covered hopper. It’s best to tool around in a website such as rrpicturearchives.net to see what cars like your subject actually look like.
Hey, you say, this was supposed to be a quick project! Now it’s starting to look like a lot of time and work! To which I respond, Sure, but who doesn’t want to spend the day looking at pictures of trains?

OK, so now you’ve done some research and have decided on the desired effects. You’ve gathered up a half-dozen cars from your collection, and set up the airbrush and a place to paint (preferably outdoors, or well-ventilated). It’s time to start painting. Here are my recommended steps.
- Paint the trucks. I usually just brush on some dark brown, lightly, i.e. hitting the highlights but not smothering the detail. If you have a less-active car, mix in some ochre to give it that rusty sheen. Don’t neglect the wheel faces, but be sure to spin them to get a uniform covering. Do the couplers at the same time, being careful not to get any paint in the works; the knuckles need to swivel freely, after all.
- Oxidize. I do this by spraying a light tan coat over the entire body, well-diluted. Fill the bottom of the air brush cup with alcohol, then drop in a bit of paint (not more than 30% by volume). Stir with a toothpick, and test-spray on a safe surface. When you’re ready, spray the whole car– lightly. The alcohol dries quickly and you can see how it’s turning out. Usually you’ll want to do several layers, just so long as you don’t completely obscure the car’s color and lettering. Refer to photos! The upper surfaces are usually more oxidized, so spray from top down to catch the highlights. Don’t neglect the car ends. Do all of your cars in a batch.
3. Road Grime. This can vary between situations, but it’s usually predominantly brown. I either spray this (same mix as in step 2) or apply as a wash, or both. For a wash, dilute a dark mix with water and flood it onto the car, one side at a time. Don’t worry if it seems like you’re overdoing it; just wick off the extra with the edge of a paper towel. Once it dries it’ll highlight the nooks and crannies nicely. For spraying, concentrate along the sill and ends of the car, keeping the most uniform grimyness down low, but apply unevenly elsewhere on the car as well. If applying to a silver roof, mix in some ochre to taste.
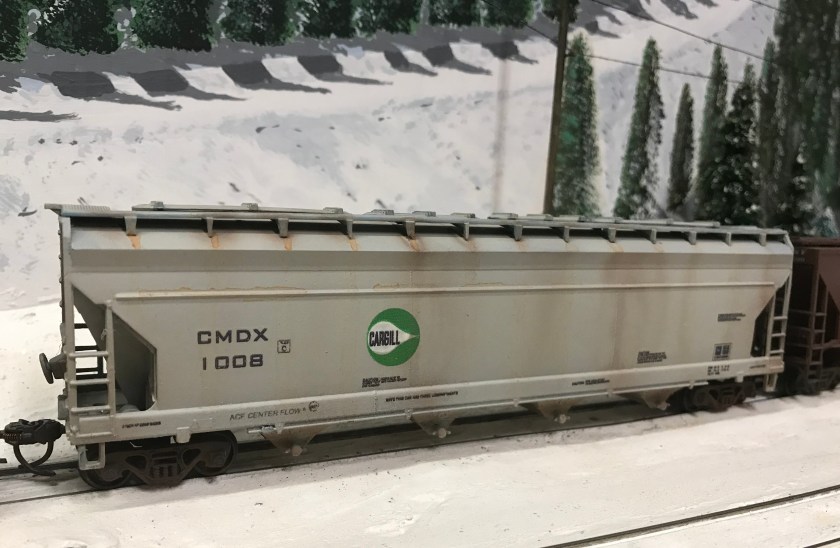
4. Rust. This can take many forms and degrees. I haven’t done much with heavy rust, but I find that covered hoppers frequently display some streaks. As shown above, I originate many streaks from the attachments on the roof. I use a brush to stripe down with ochre paint, dragging down vertically. Some of the wash collected along the stiffener ribs, which is just fine. I also reinforced this with a bit of darker grime, carefully applied with a drybrush and reinforced with the airbrush. Also pay attention to welded seams on the carbody; often those display a streak of rustiness. I have seen people create rusty scratches on cars using oils and other techniques, but I’m going for quick-and-dirty, literally.
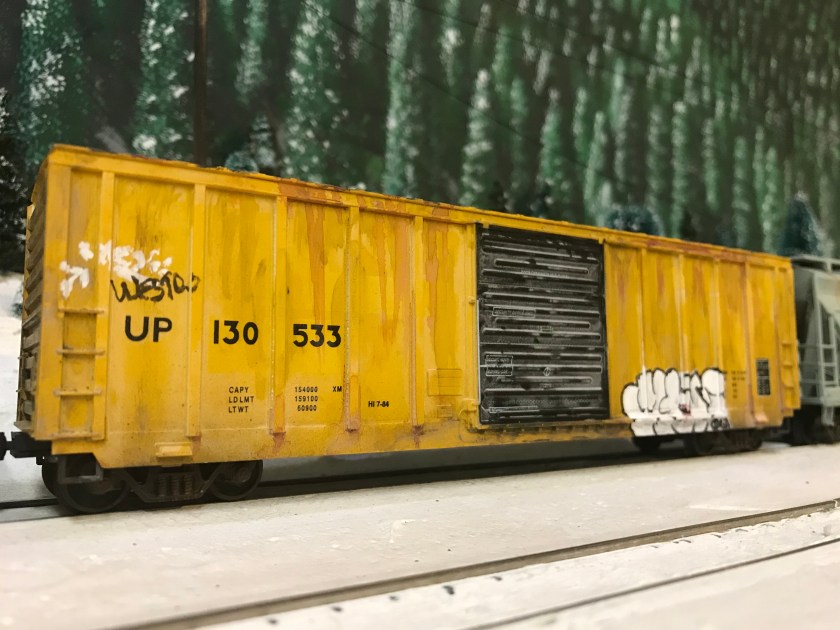
5. Graffiti. This is a modern phenom, so just decide how to proceed based on era. I’ve done several cars. The real key is to consult photos, and try to duplicate something you see there. This step is a bit different than the others, as you must incorporate additional colors of paint, and use a very fine brush in most cases. I’m not all that old, but I still two-hand the brush to keep it steady. The nice thing is, a little wiggle or smudge isn’t the end of the world when doing tagging! Plus, you can always wash it off and start over if necessary.
Something else to consider: multiple “artists” may have tagged any given car. Feel free to use a variety of artwork. And don’t neglect the other side!
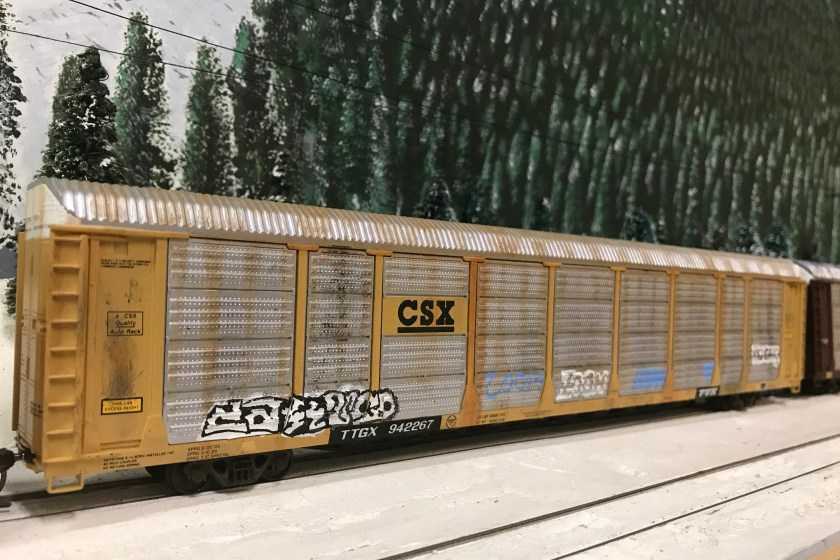

So, for about 90 minutes of work, it’s possible to dramatically enhance a half-dozen inexpensive freight cars. Doing graffiti adds more time and difficulty, but it will really bring your layout into the 21st century with a fairly minor amount of effort. Weathering brings a model to life, and by extension, livens up the whole model railroad.

