
La Plata Division links menu:
- Concept
- Construction
- Eras
- Equipment
- Operations
- Scenery and Structures
- Timeline Photos
In many ways, the layout was built “on the cheap”– kind of like most of the original Rio Grande system! In this case, it usually meant that I utilized whatever materials were available.
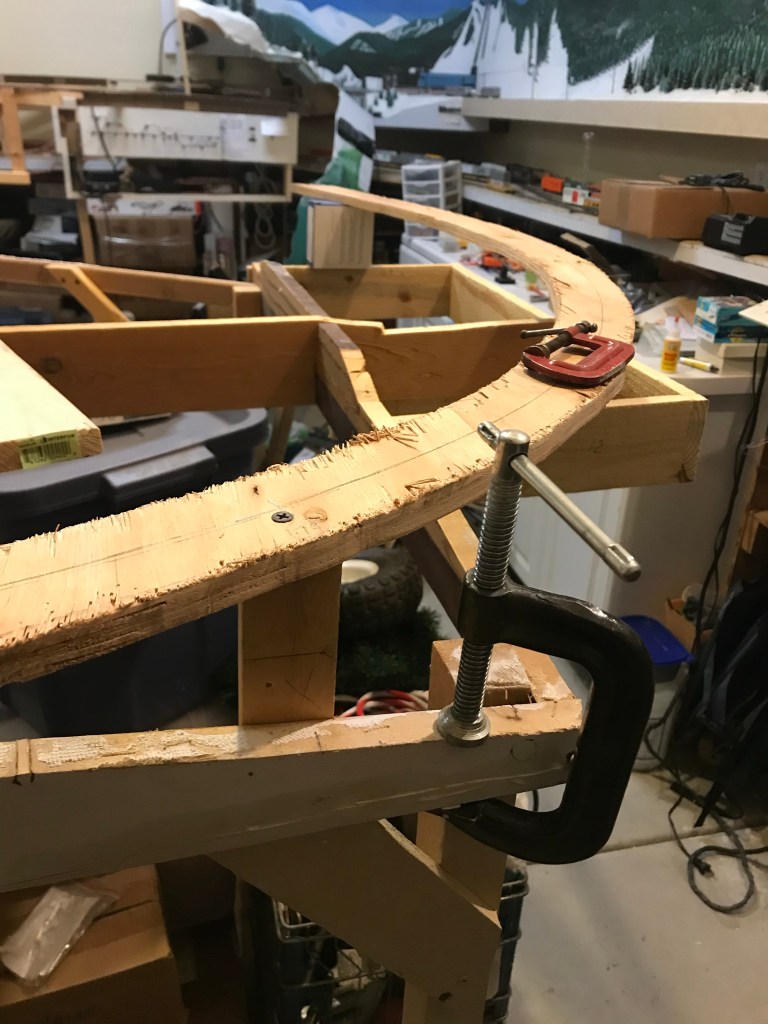
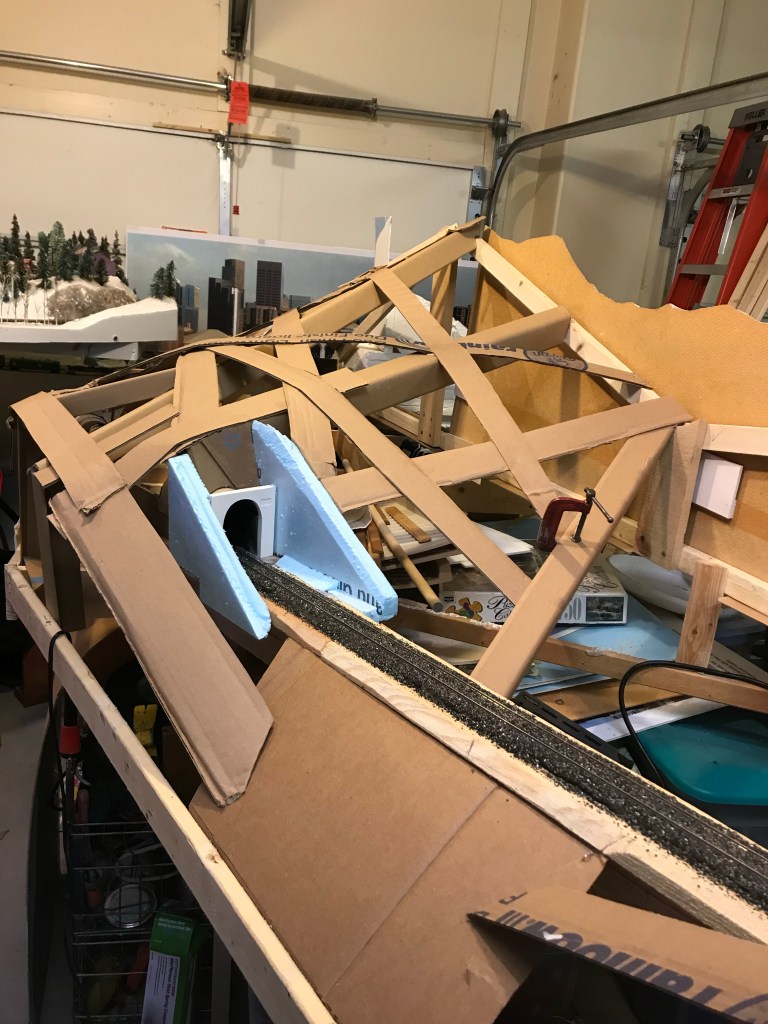
The benchwork is a hodge-podge of techniques, depending on the portion of the layout. For the most part, it’s open-grid 1X4, with cookie-cutter 1/2″ plywood for subroadbed. (Hint: don’t leave your plywood out in the rain– it tends to warp and make life miserable!) I even incorporated some structural aluminum pieces in some places. Later construction uses some 5/8″ waferboard for the subroadbed, which is the best material I’ve found yet. Several sections are made from a sheet of outdoor siding that I picked up at a yard sale, but I’ve found it to be so hard that most track nails bend before they’ll penetrate it. I ended up having to drill each nail hole. I wish I’d found the waferboard first!
This photo shows the Big 10 area (as installed on the layout’s previous location) before the scenery was applied. It shows the 1X4 open-grid method, with cookie-cutter subroadbed from 1/2″ plywood.
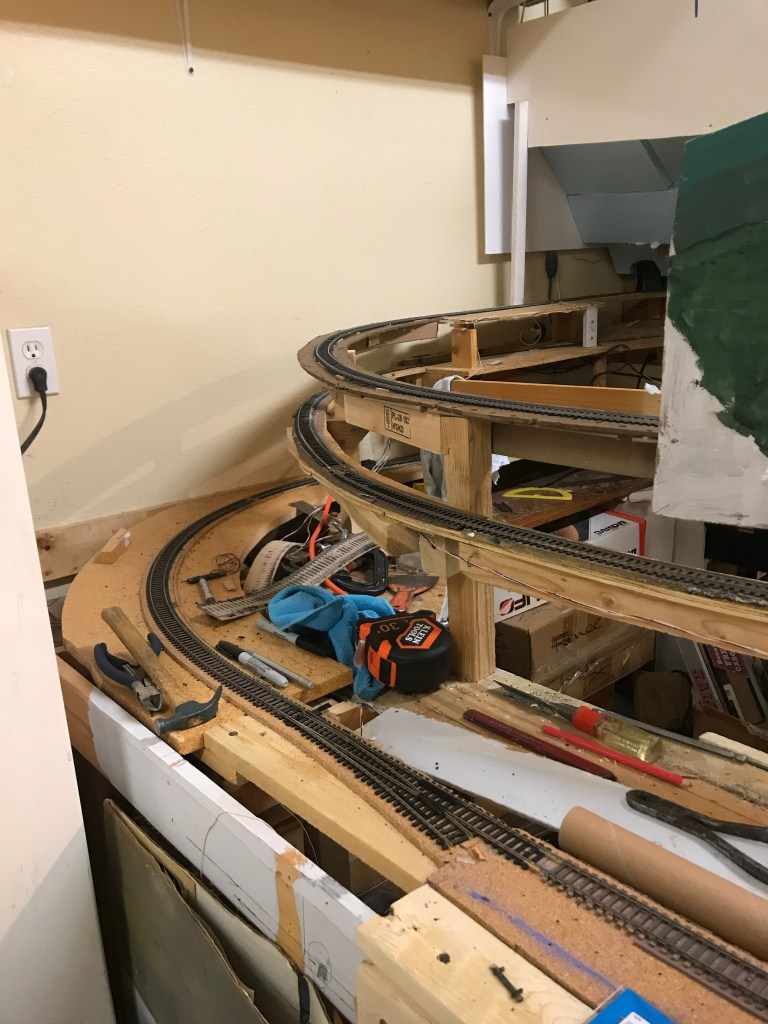
My roadbed is mostly cork. North Yard is underlain with sheet craft foam, which I have found to be a far more economical method than cork, plus it looks better in yards. Track is basic Atlas code 100; I opted for cheap-and-easy, even if it’s not quite scale. Minimum curvature is 24″ radius, although that’s only in a couple of older areas; all the new track is 30″ radius. Nearly all track switches are No. 6, which make for smoother, better-looking operation and gentler yard ladder tracks than No. 4’s. Powered switches use Atlas snap switch motors (some of the under-the-table variety). I utilize manual ground throws on many unpowered switches.
As mentioned elsewhere, the control system is evolving. Generally, wiring was built as basic 2-controller block wiring, with a separate cab and control panel to operate North Yard. Leftover spools of twisted-pair telephone wire made the block wiring easy and inexpensive. However, I have converted to Digital Command Control (DCC). Running it through my existing control panel means I can operate standard DC when desired. Using a bypass switch on each control panel, I can change back and forth from DC to DCC.
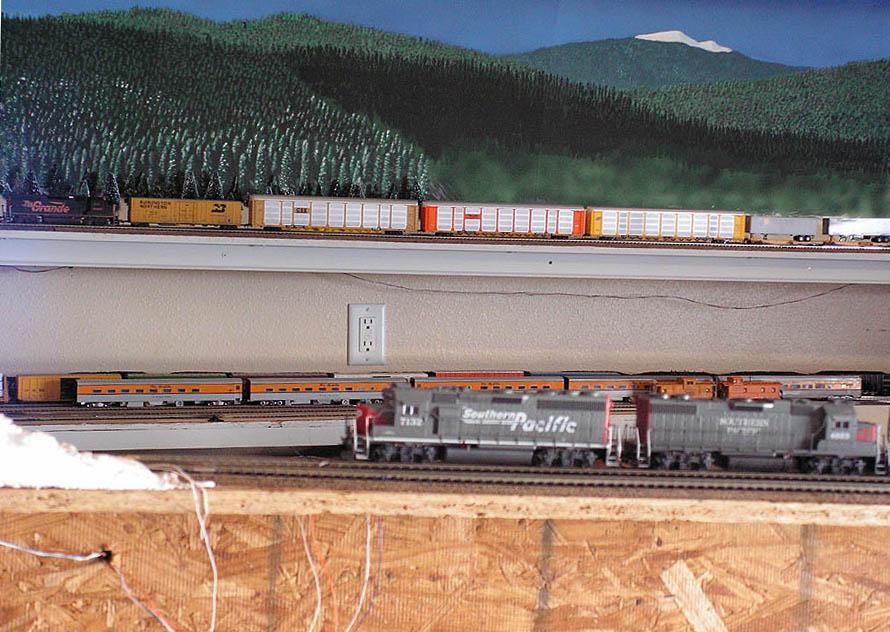
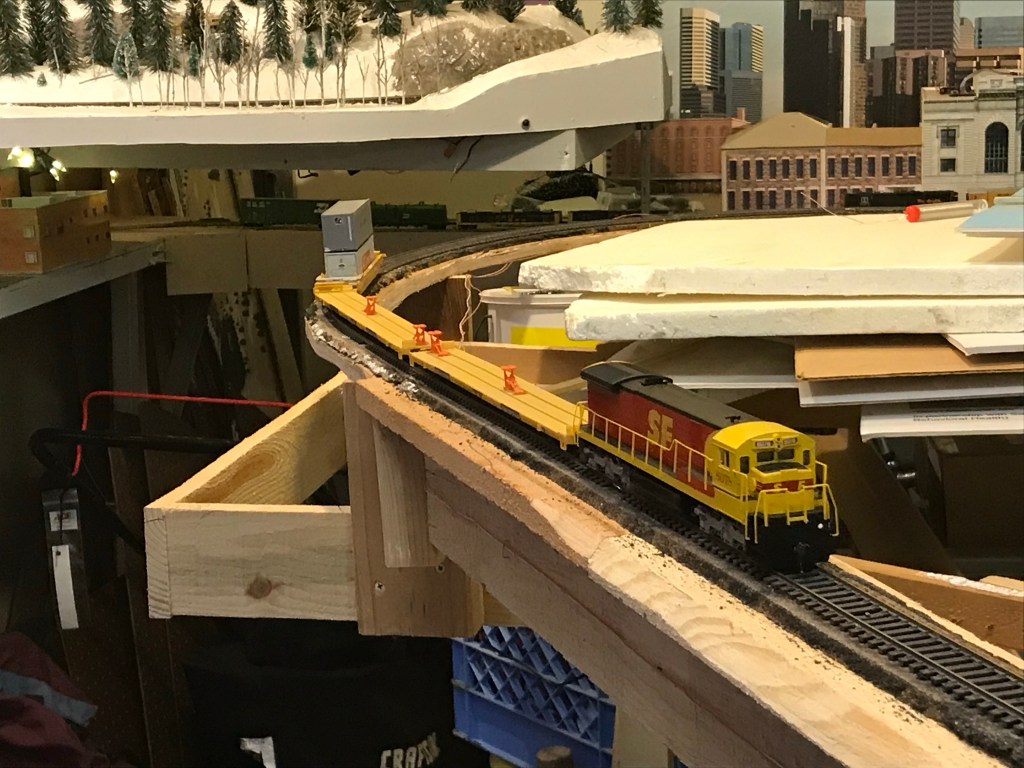
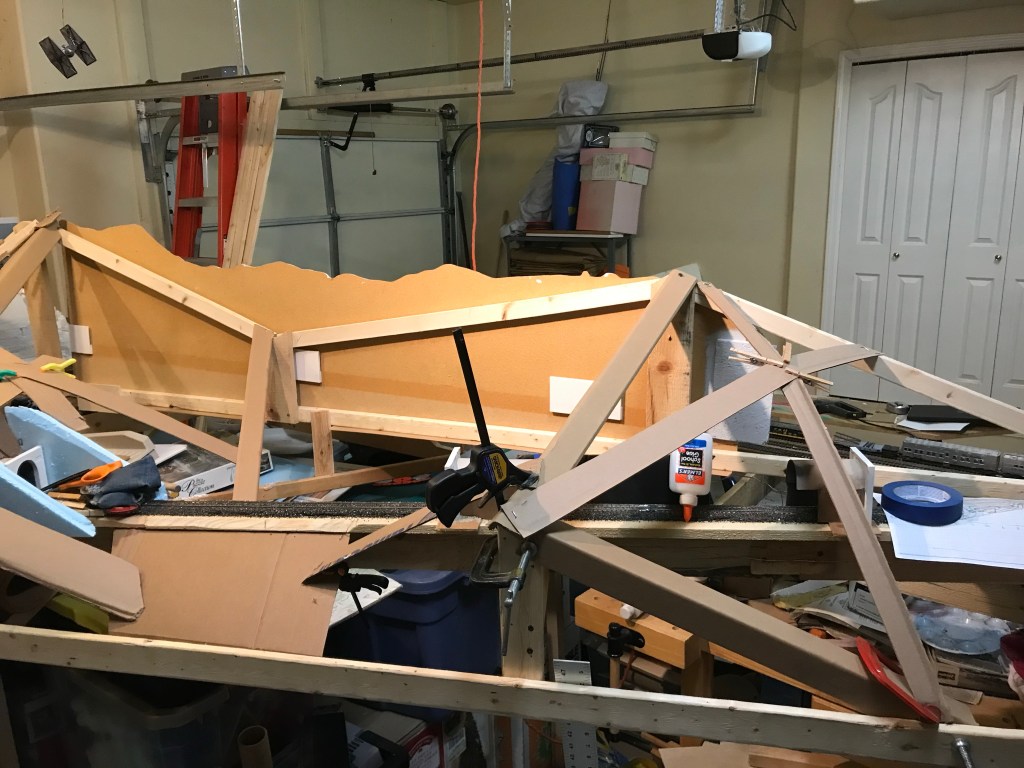
Above is an overview of the middle section of the room, as it existed up until November 2023. In the foreground is the back side of the Plainview/ tunnel 2 area. You can see the chipboard subroadbed and support. Later, I installed fascia here, as well as a backdrop, eclipsing this view.
In the background, you can see the upper and lower levels of the layout. Denver North Yard is below, and Winter Park siding is above. You can see the aluminum channel that supports the upper level. The backdrop wasn’t quite complete at that time, but you can get an idea how it’s done. Also note how the actual (3-D) trees blend into the ones on the backdrop. The railroad’s grades are evident, especially when compared to the bottom-level yard section, which is essentially flat. In the foreground is Clay/Plainview siding.
The new peninsula has enormous mountains. Here’s a look at the process of creating them.
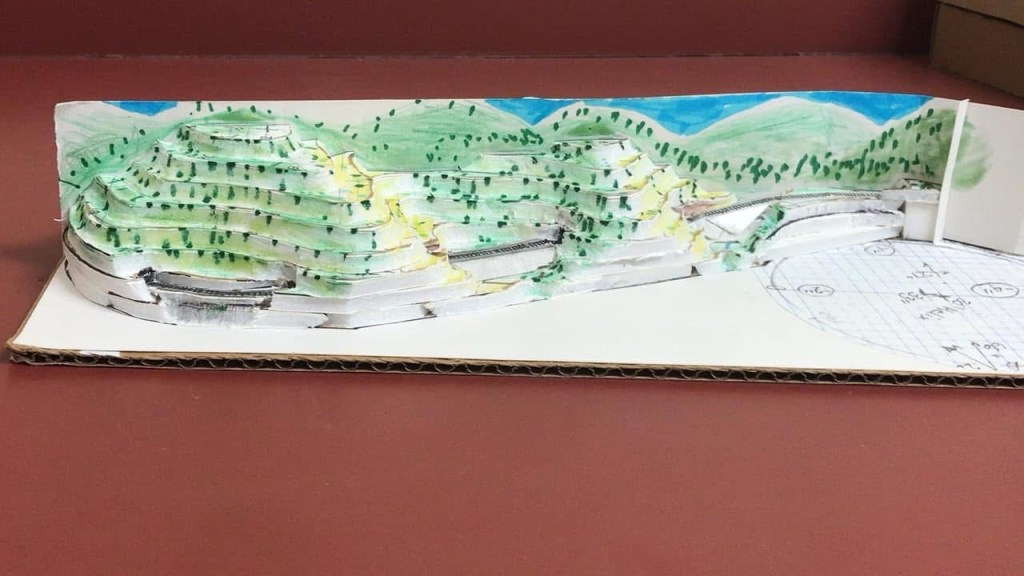
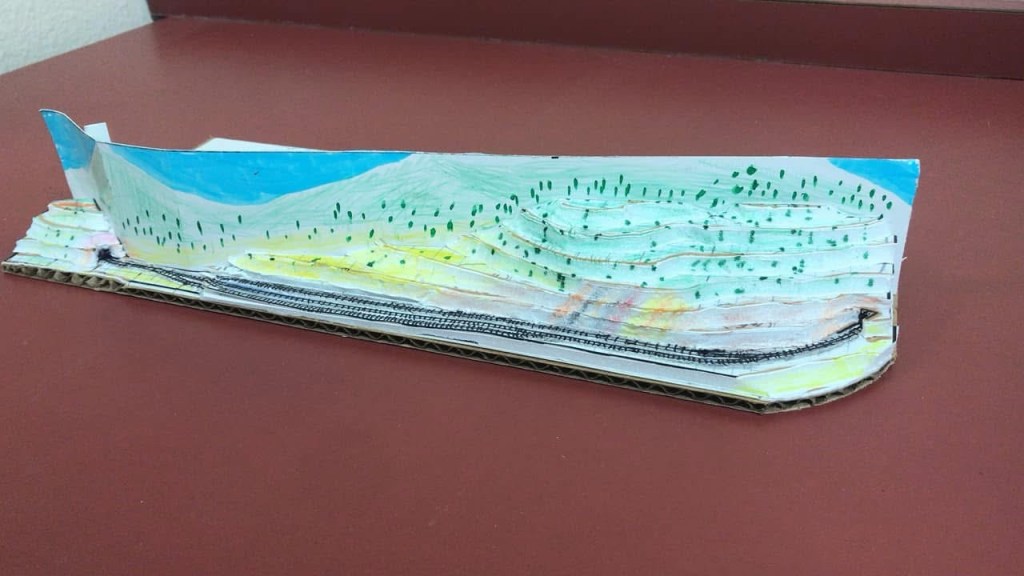
Step 1 was to get a 3-D rendering of the desired shapes. I printed out the contour-map rendering of the design (2 copies), glued them to foam core board, and cut out alternating contours. Then I stacked them– kinda like the teppanyaki restaurants do with the onion slices? I did this so that I could visualize the end result. It REALLY helped me shape the landforms.
Step 2, of course, was to build the benchwork. As mentioned, I kept the old structure as a foundation. Massive modifications were required, but it did the job. I salvaged plywood decking from pallets and cut cookie-cutter pieces for roadbed. I also used 1X4 slats to support the tangent between tunnels 14 and 16.
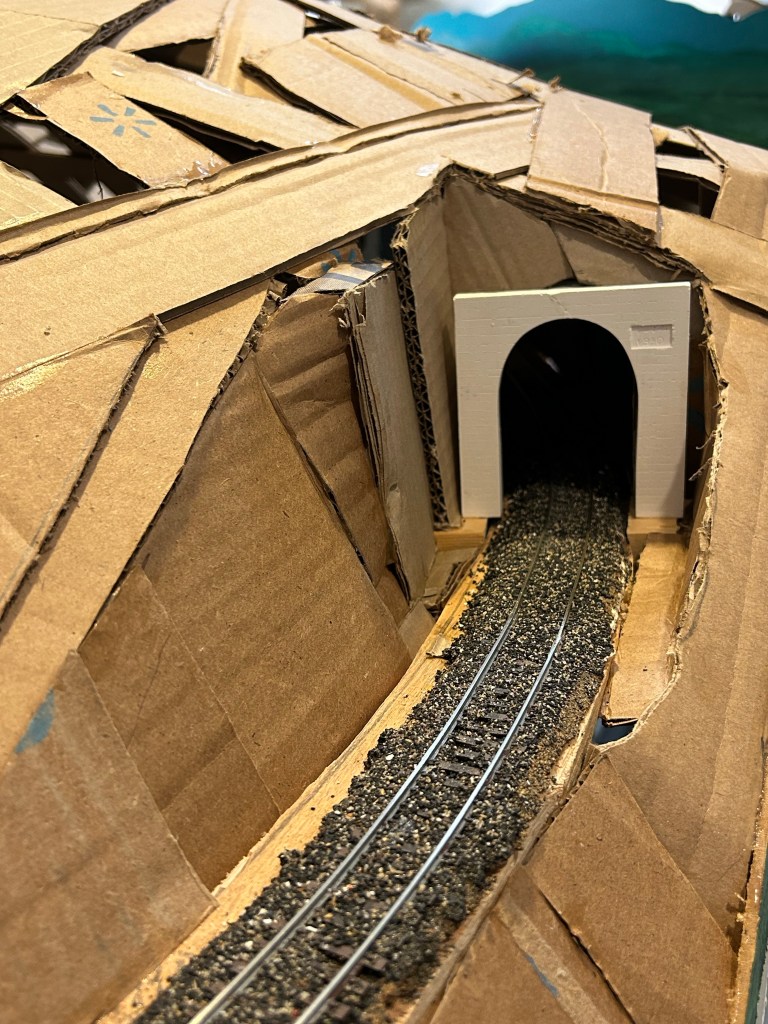
I chose to ballast the tunnel interiors now, since I could access them!
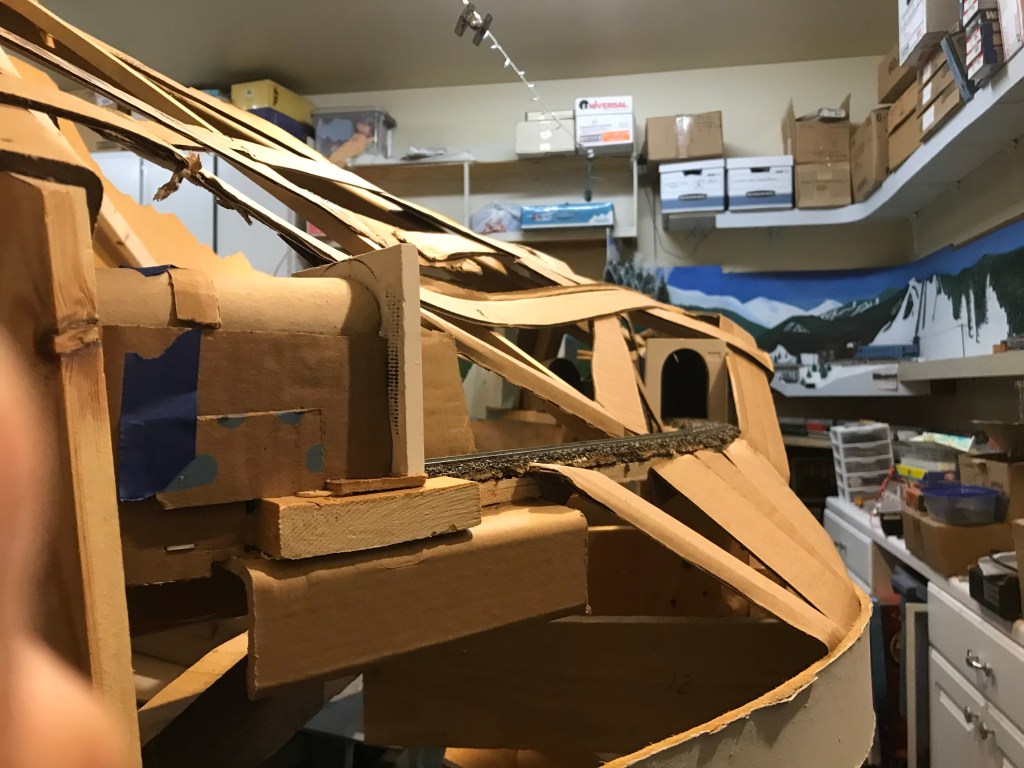
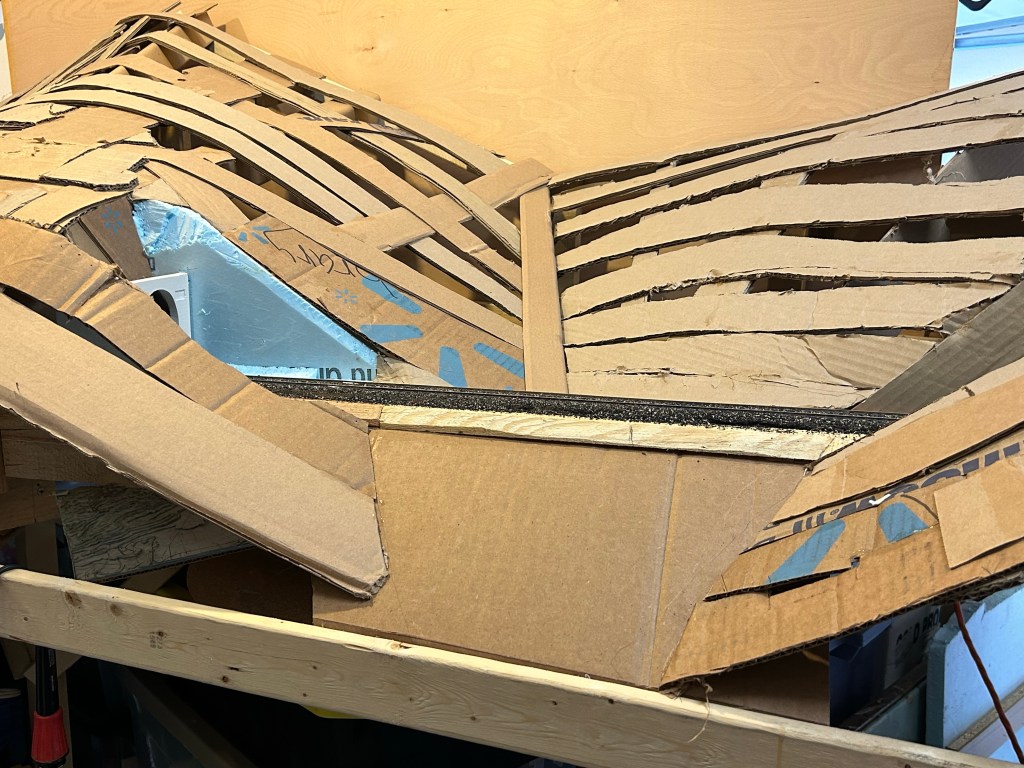
Next up, create the supporting structure for the mountains. Basically, something for the ridges and the bottoms of the draws. Then, cut and glue many, many cardboard strips in a lattice, to support the shell. Here’s where the 3-D model was very useful. You can see that I have already cast the tunnel portals and placed them. A note about tunnels: I always left one side open on the interior, in case a train derails and gets stuck. That way I can reach in from below and remove it. This has already paid off!

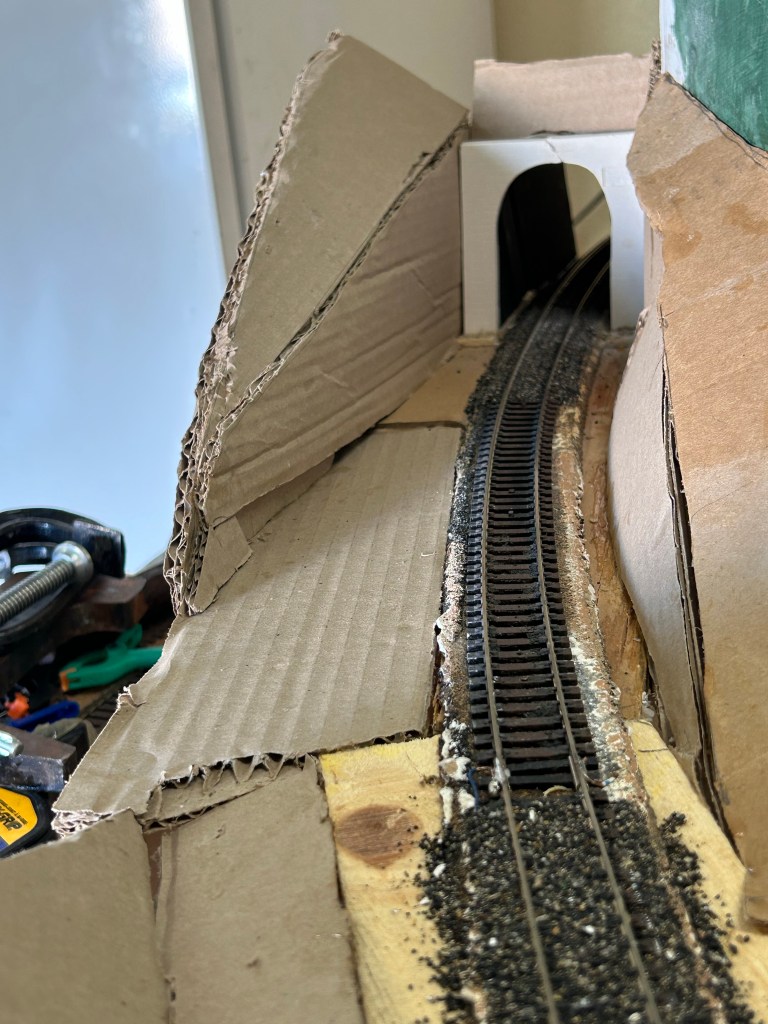
I carefully placed the portals after much testing with long and tall cars. So far, no issues.
As the cardboard lattice got more complete, I started filling in areas with fitted blanks of cardboard to get the shape closer to the final.
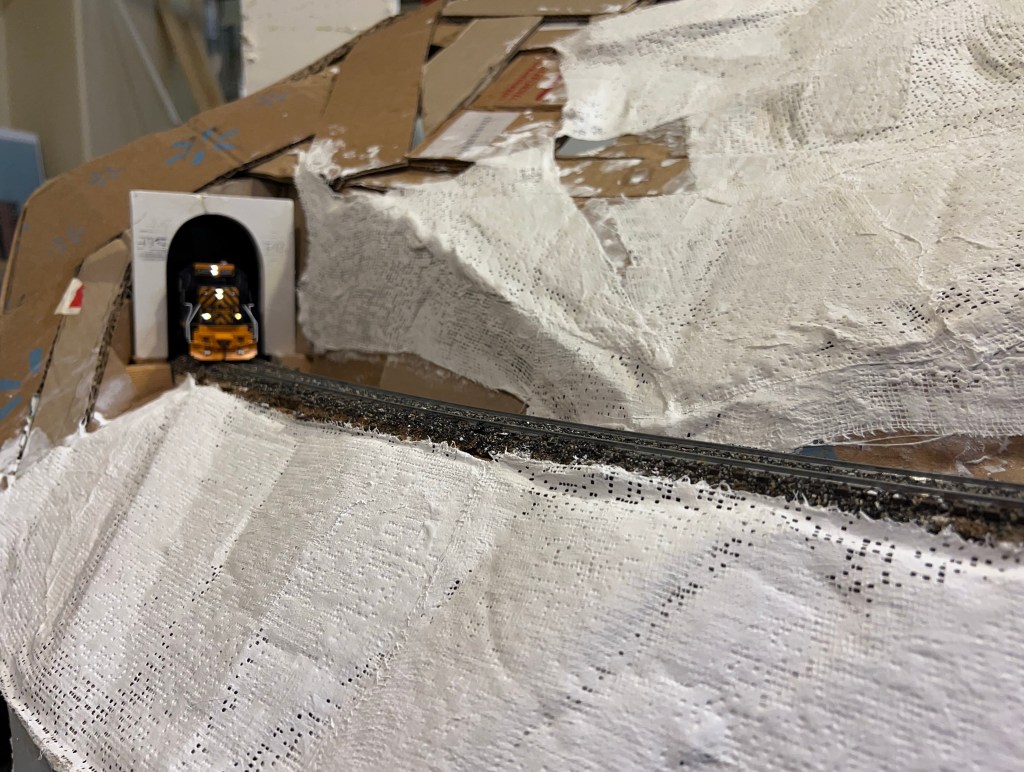
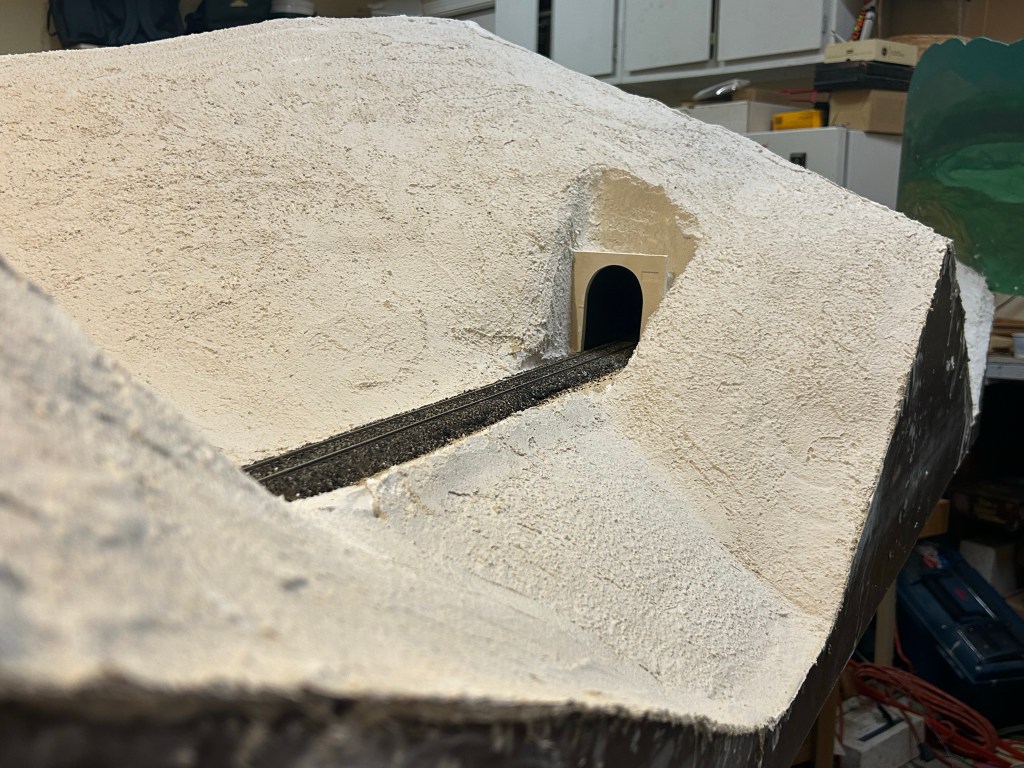
Once the lattice was sufficient, I lay plastered gauze over everything. Amazon sells this in large packages, and I needed a LOT. Then I covered all this with a couple coats of structural plaster (this brand was blended with perlite, and was very rough but quite strong).
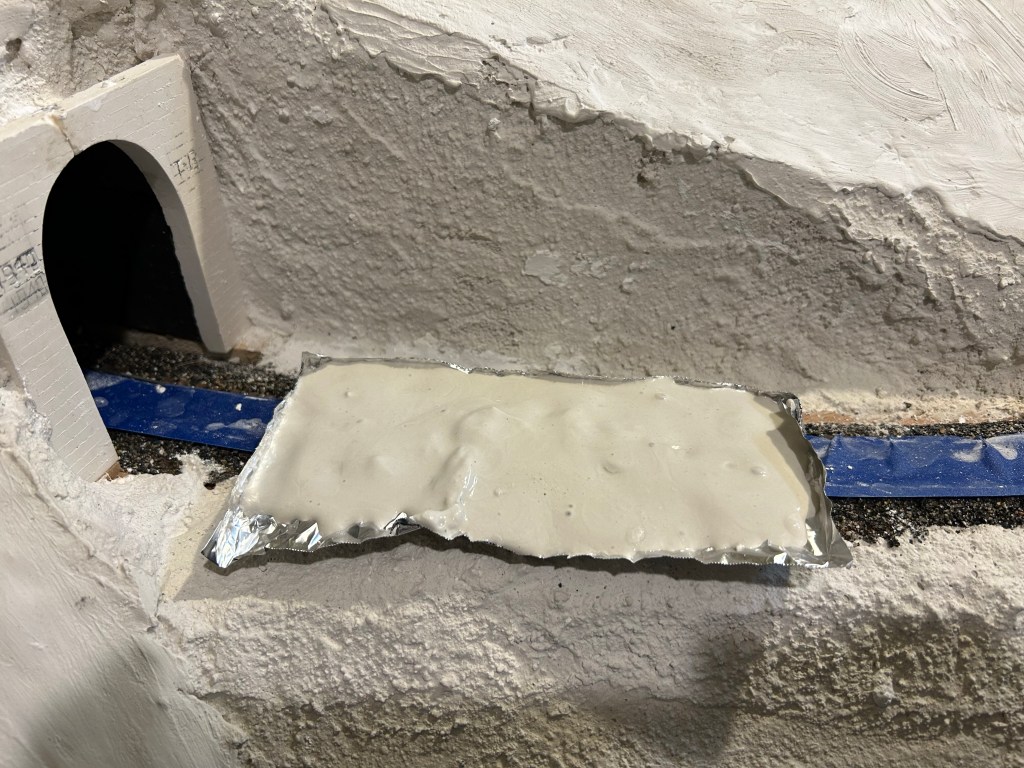
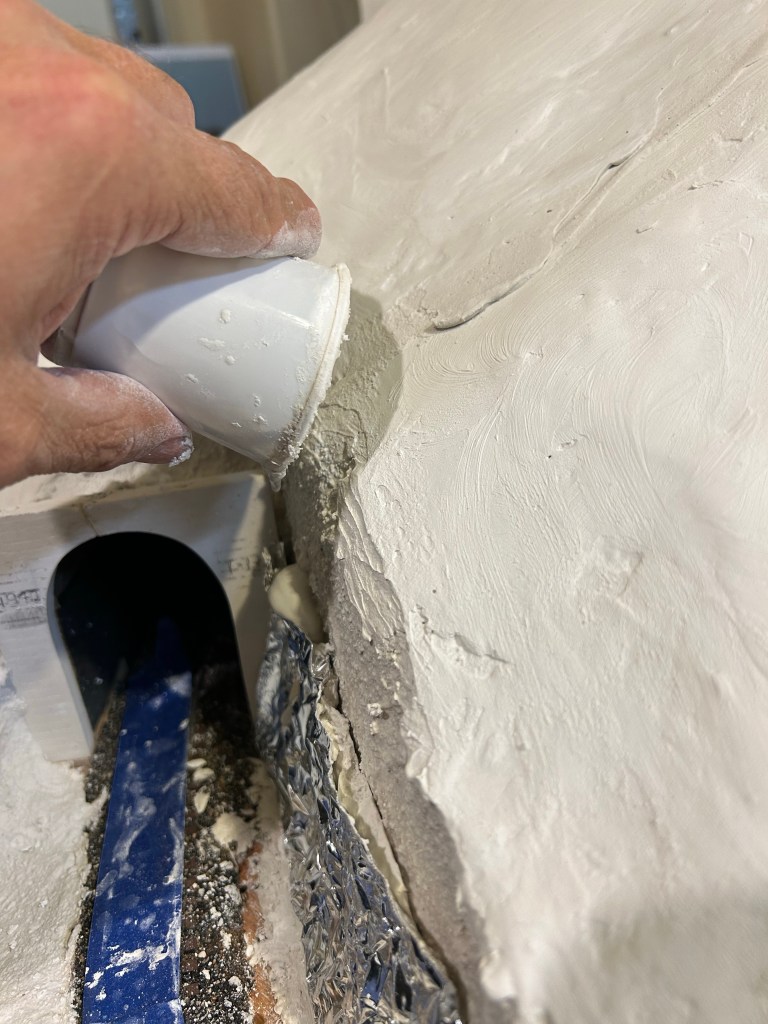
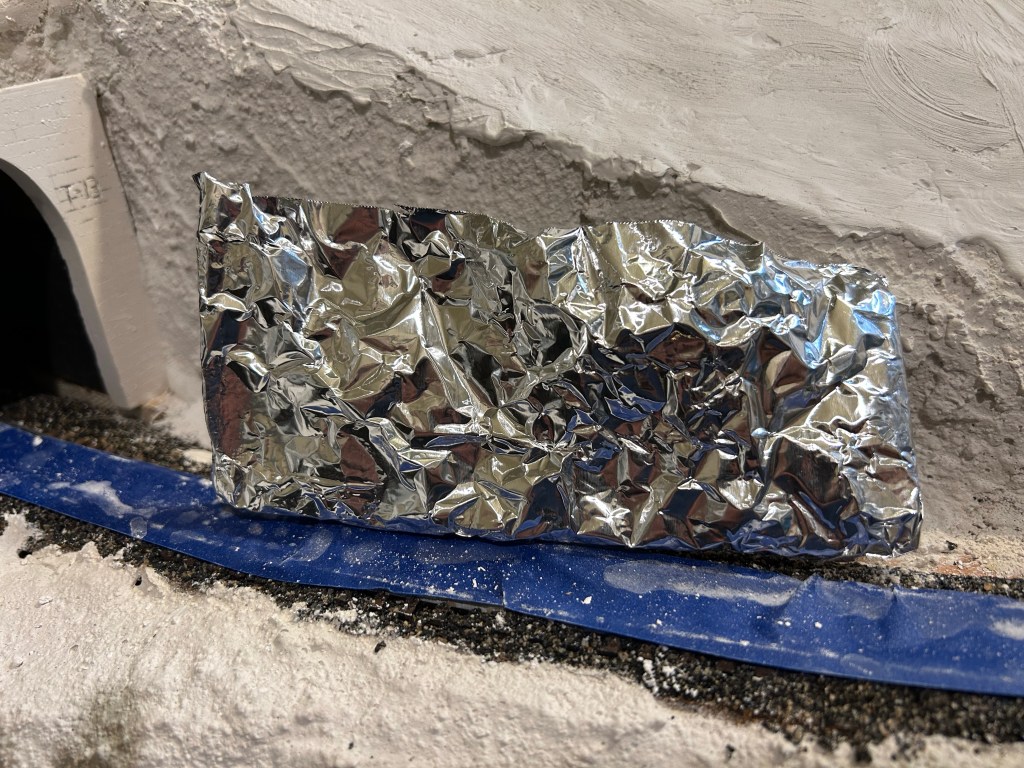
After top-coating everything with coats of smooth Plaster of Paris, it was time to start casting rocks. All the tunnels have extensive cuts through the native rock, and it’s rough and jagged. Perfect for using the crumpled-foil casting technique! This process went on and on. Many rock faces required multiple castings, joined together. Working over the tunnel portals was tedious but all the gaps had to be filled. I also had to add “wings” to some of the portals to reach the rock walls. Remember, in the real world, all these tunnels were simply blasted in the raw rock; the portals were added decades later to keep the snow and rocks off the track.
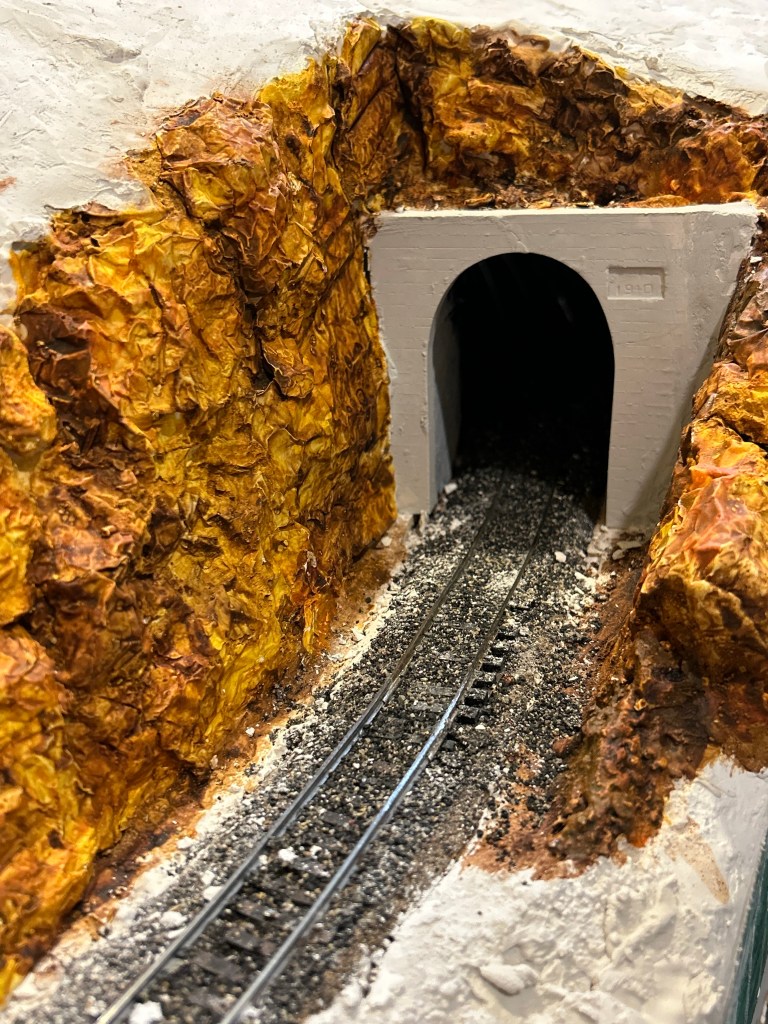
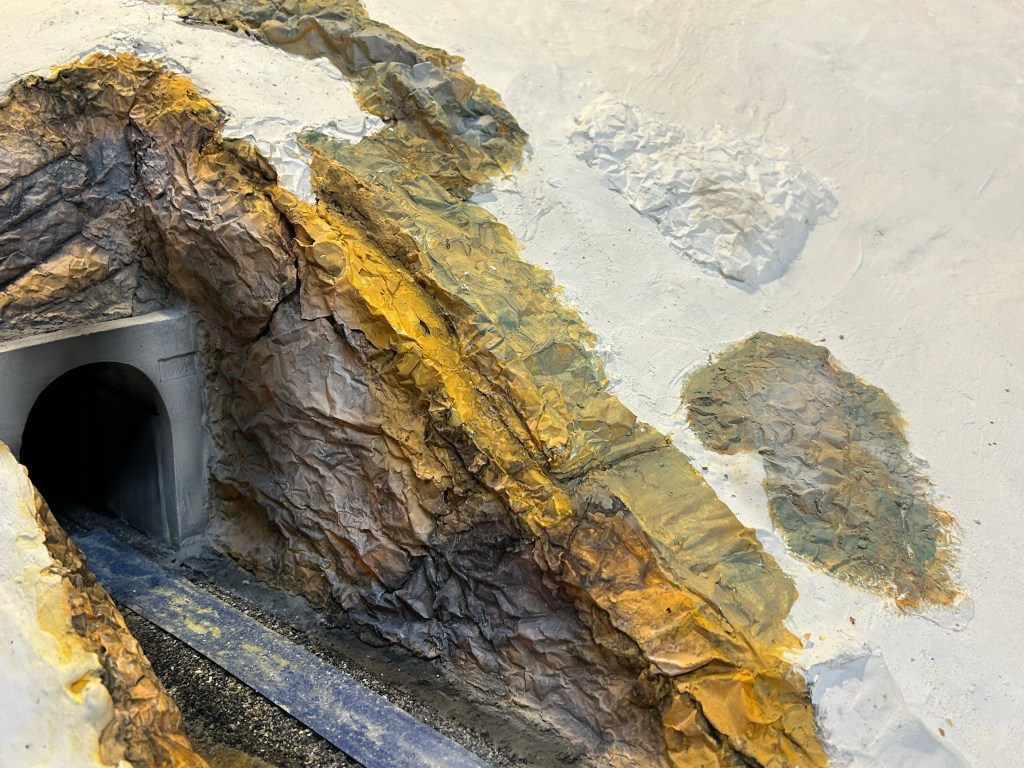
Once the rock was all cast, I started the painting process. The native stone consists of various sedimentary strata, ranging in color from orange to yellow to red. I created a number of natural rock outcroppings as well as the engineered cuts. On the cuts, after base painting, I oversprayed with a light tan to blend things together, and applied a black wash to accent the cracks and crevices. Finally, I sprayed a black layer of soot on the portal faces and *lightly* on the adjoining rock faces.
Fun fact: the natural rock outcrops in this zone are heavily colonized with lichen– at least four colors of it– which from a distance appears a grayish-green color much like sage. So for these outcroppings I dabbed on a topcoat of sage paint to represent this. The blasted rock faces have not really acquired a lichen coating, despite them being cut over a century ago. I guess lichen growth is pretty slow…
It’s always winter here, so the ground is painted with gloss white latex paint/primer with shiny glitter lightly scattered on the top surface. The hundreds of trees which I planted are either pre-dusted with snow or have that added by yours truly. Yes, there was a time that I thought that a couple hundred trees was enough. I laugh at such folly now.
Current Status:
- The entire Big 10 scene has been demolished, from Rocky up through Tunnel 30. The underlying benchwork was recycled and modified to support the new Plainview / South Draw peninsula (see the new track plan).
- I’ve demolished and rebuilt the helix, now with a 30″ radius instead of the old 23″. This makes it much larger, of course, but now the long heavy trains stay on the rails. On the new peninsula, curves have also been kept to 30″ or greater, applying the lessons of operations over the past 15 years. The main lesson is, it’s difficult to successfully operate trains on steep grades with tight curves.
- So: the new peninsula and the helix are functionally complete; just a few scenery details to add.

